
01
Choose the exact view
Set front, three-quarter, side, back, low, or top-down framing for the camera angle control instead of asking the model to guess.
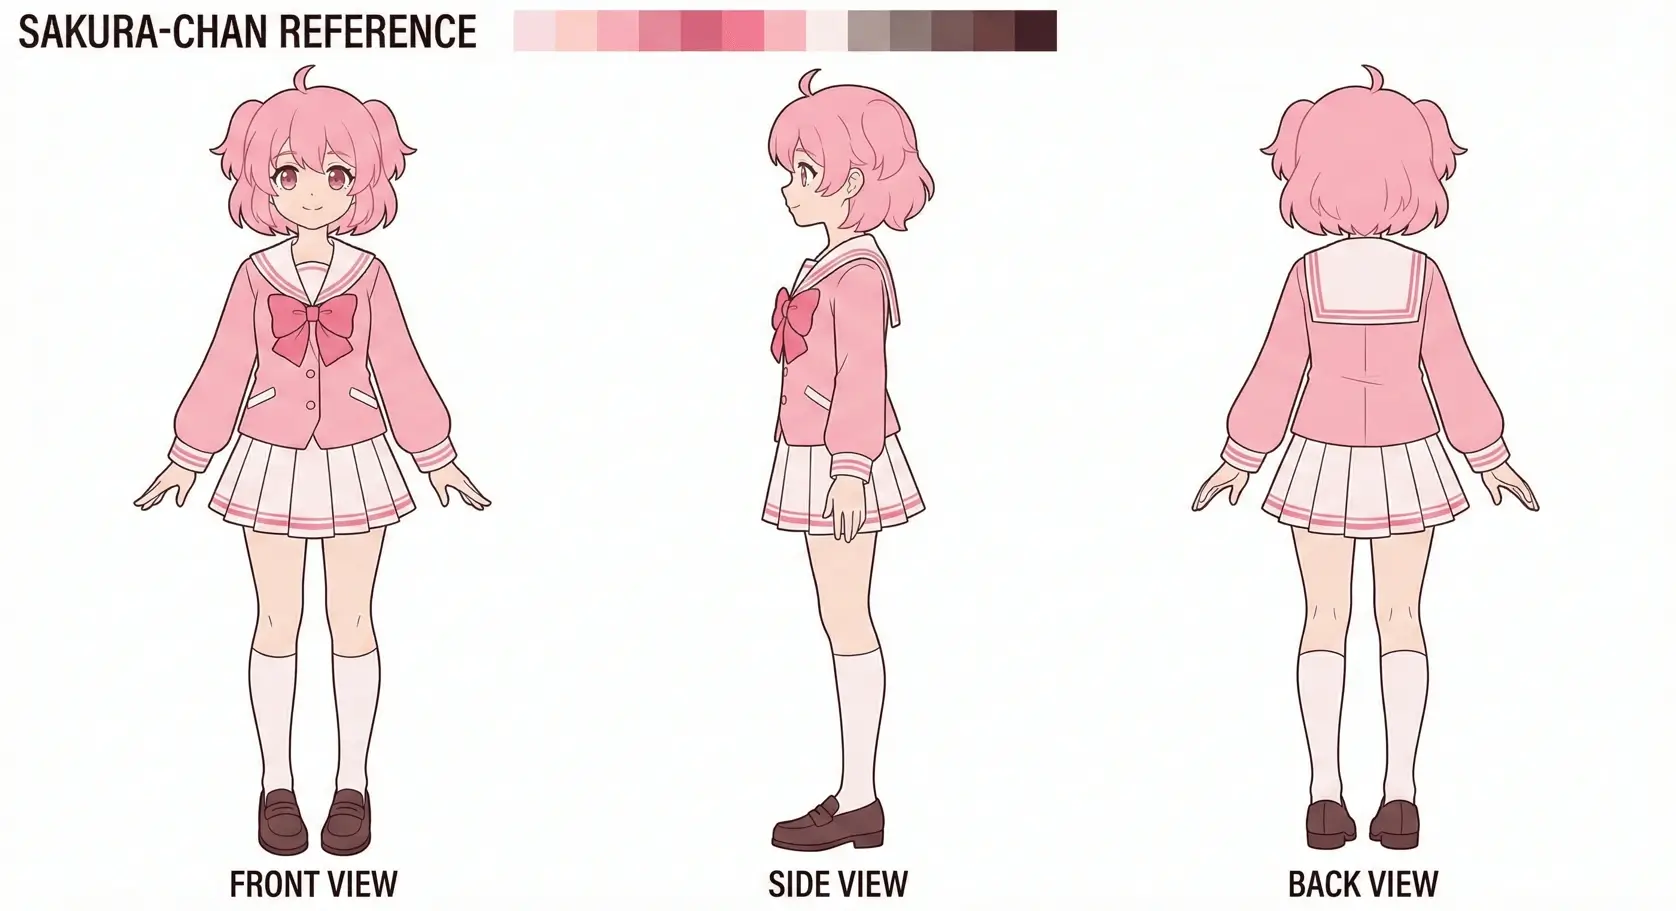
Create precise horizontal, vertical, and distance control for artists, sellers, and AI video planners who need repeatable viewpoints. Upload reference images, set the camera, and keep the original subject as your visual anchor.
Directed generation
A useful camera angle control needs more than a rewritten prompt. Set horizontal rotation, vertical elevation, and distance before you generate each view.
01
Set front, three-quarter, side, back, low, or top-down framing for the camera angle control instead of asking the model to guess.
02
Upload up to three references so the camera angle control follows the same identity, materials, palette, and silhouette.
03
Choose close, medium, or wide distance, then export the camera angle control view as JPEG, PNG, or WebP.
최대 3장. 드래그 앤 드롭 또는 클릭하여 업로드.
위쪽 왼쪽 다이어그램과 일치: 피사체 주변의 카메라 위치.
위쪽 오른쪽 다이어그램과 일치: 렌즈 높이와 각도.
점선 링이 작을수록 더 타이트, 클수록 더 넓은 장면(두 다이어그램 동일).
생성된 이미지가 여기에 표시됩니다.
Three-step workflow
선택한 카메라 설정을 따라 생성하므로 전체 프롬프트를 다시 쓰지 않고 시점을 탐색할 수 있습니다.
최대 3장으로 정체성·스타일·재질 앵커를 제공합니다.
생성 전 수평 회전, 수직 고도, 프레이밍 거리를 선택합니다.
JPEG·PNG·WebP로 다운로드해 워크플로를 이어갑니다.
Prompt recipes
Use a short constraint prompt to protect the details that matter. Pick a recipe below, then refine it in the generator.
Lock subject identity and silhouette; change only the camera azimuth, elevation, and distance.
Keep materials, logos, and asymmetrical details intact under the new viewpoint.
Controlled camera-angle reference frame, neutral lighting, clear subject separation, no style drift.
Production uses
일관된 시점이 필요할 때 3D Camera Control을 사용하세요.
한 장의 참조로 스토어용 제품 각도를 만듭니다.
좌·우·후면·로우·탑다운을 처음부터 다시 프롬프트하지 않고 탐색합니다.
피사체는 고정하고 카메라만 옮겨 더 깔끔하게 반복합니다.
Consistency first
The camera stays explicit and the source images stay visible throughout the workflow, giving you a clearer base for review and iteration.
참조 이미지를 중심으로 두고 수평·수직·거리 시점 컨트롤을 제공합니다. 새 프롬프트에 운을 맡기지 않고, 먼저 카메라 설정을 고른 뒤 생성합니다.
일반 생성기는 각도 변경 시 정체성이나 디테일이 흔들리기 쉬워 멀티뷰를 신뢰하기 어렵습니다. 피사체 연속성과 시점 선택을 분리하면 이커머스·캐릭터 파이프라인·AI 영상 기획에 더 적합합니다.
선택한 카메라 설정을 따라 생성하므로 전체 프롬프트를 다시 쓰지 않고 시점을 탐색할 수 있습니다.
Practical answers
도구를 비교 중인 크리에이터를 위한 실용 답변.
Camera angle control means choosing azimuth, elevation, and distance explicitly so each generation explores a viewpoint instead of guessing from text alone.
Yes. One clear reference can work, but two or three references usually give a camera angle control better guidance for hidden details and asymmetrical features.
Start with the view missing from your current set. Use 0° for front, 90° or 270° for side, and 180° for back. A neutral camera angle control usually works best at eye level.
Treat output from the camera angle control as planning or draft material. Review identity, text, materials, and hidden details before it becomes a final deliverable.
Yes. Upload up to three images. A hero shot, a detail crop, and an existing alternate angle can give a camera angle control better visual constraints.
Use clean references, keep the prompt focused on unchanged traits, generate one deliberate view at a time, and compare every result with the source before continuing.
사람, 캐릭터, 제품, 오브젝트, 장면에 사용할 수 있습니다. 선명하고 디테일한 참조일수록 큰 시점 변화에서도 잘 유지됩니다.
일반 생성기는 롤 간 연속성을 보장하지 않습니다. 본 도구는 참조를 유지하고 전용 카메라 컨트롤로 시점만 바꿉니다.
인식 가능한 정체성과 핵심 디테일 유지를 목표로 하지만, 참조 품질과 각도 폭에 따라 달라지므로 제작 전 검토하세요.
네. 한 번에 하나의 지향 뷰를 만들거나 스튜디오 턴어라운드 흐름을 사용할 수 있습니다. 유료 플랜은 더 많은 생성량과 우선 처리를 제공합니다.
네. 무료 크레딧으로 시작하고 필요 시 업그레이드하세요.
업로드 이미지에 대한 권리가 있고 법과 약관을 따르면 가능합니다. 리스팅, 콘셉트 참조, 마케팅 스틸, 영상 기획 프레임 등에 사용할 수 있습니다.
Keep building
Move between adjacent tasks without leaving the same directed camera tool.
Open the product multiple views workflow with a matching default camera setup.
Open the change photo angle AI workflow with a matching default camera setup.
Upload up to three references and control horizontal rotation, vertical elevation, and distance.